1. Create a redis database
Go to console.upstash.com/redis and create a new global database. After creating the db, copy theUPSTASH_REDIS_REST_URL and
UPSTASH_REDIS_REST_TOKEN to your .env file.
2. Create a flag
Go to console.upstash.com/edge-flags and select the database you created in the previous step. Create a new flag and enable it. Then you can add some rules.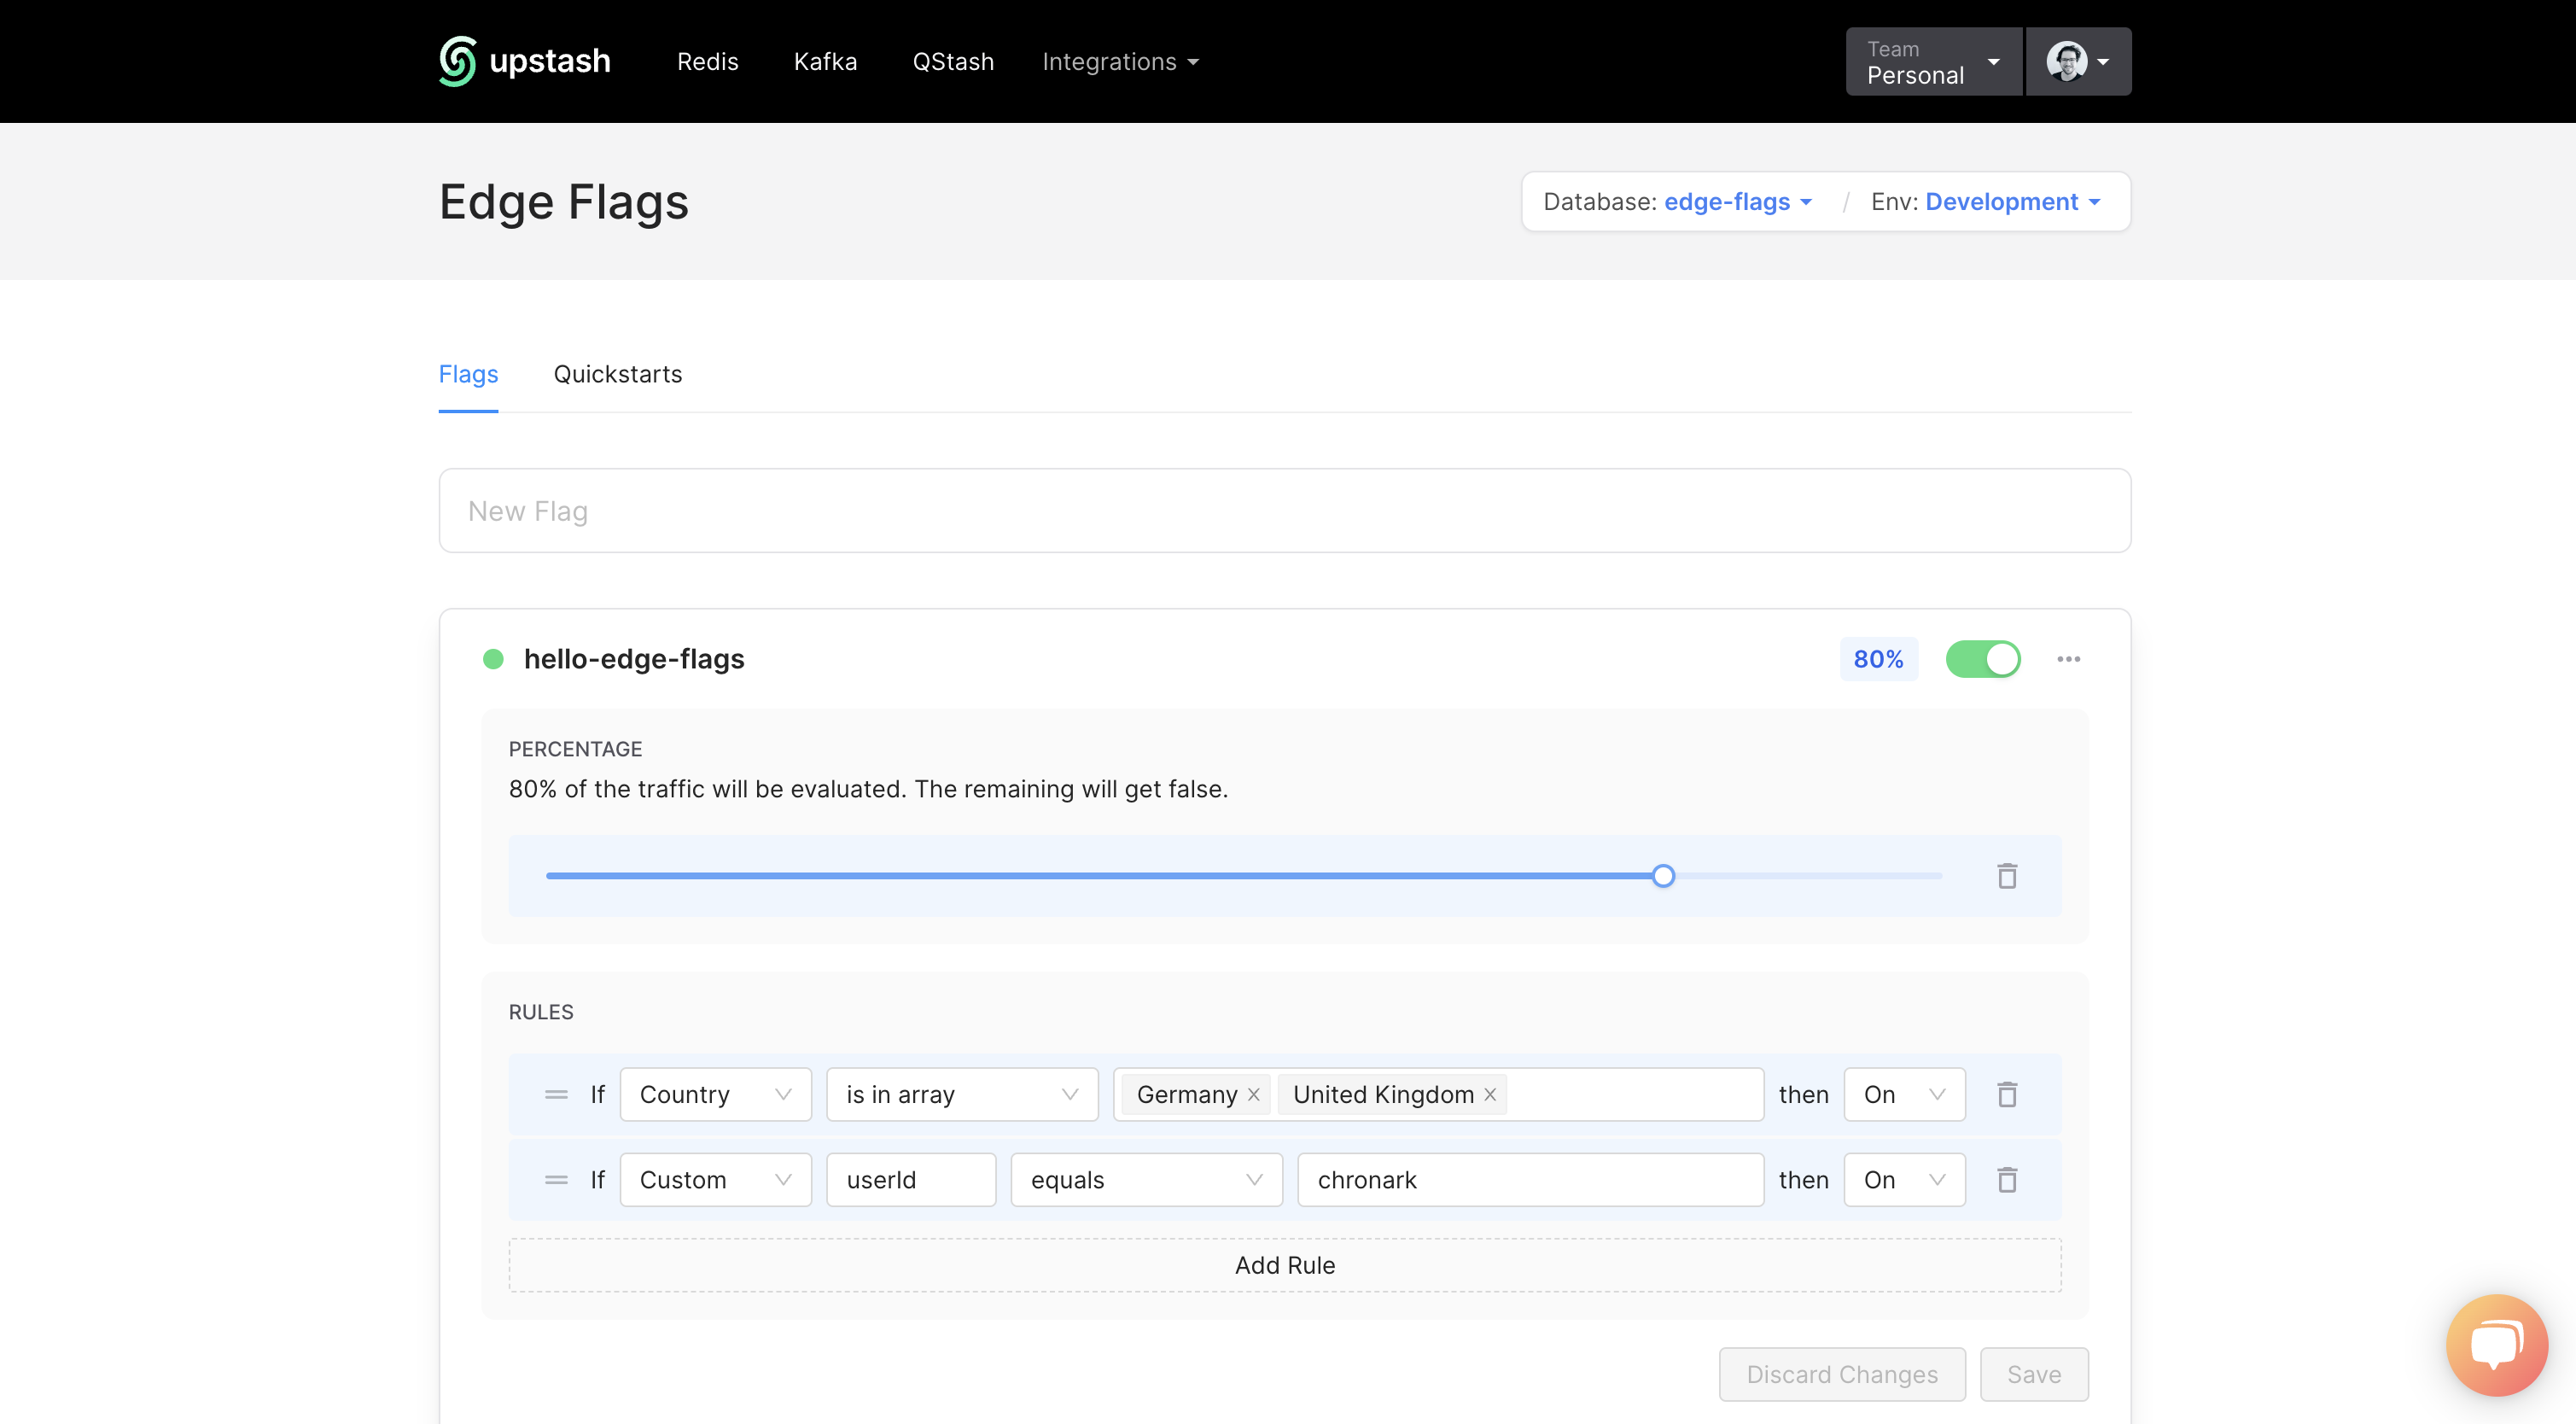 In this case, the flag has a percentage and 2 rules. For 80% of the users the
flag will be evaluated. For the other 20% the flag will immediately return
In this case, the flag has a percentage and 2 rules. For 80% of the users the
flag will be evaluated. For the other 20% the flag will immediately return
false without evaluating the rules.
- The first rule is a geo targeting rule. It will enable the flag for users in Germany or the United Kingdom.
- The second rule is a custom attribute rule. It will enable the flag for users
with the attribute
userIdset tochronark.
false
Make sure you have enabled the flag by clicking on the toggle button in the top
right corner.
Now lets use the flag in our Next.js project.